Panning Photography a PistonClick Guide

Panning Photography a PistonClick Guide

The Vintage Motorcycle Club practice day Mallory Park.

The racing season is only a few weeks away, the weather is getting better and motorsports enthusiasts are starting to plan what events to go to. As a spectator photographer I've been keeping my hand in over the winter with a bit of beach racing and rallying. Both need different skills to capture a good image and this is one hobby that benefits from a bit of practice.
Now that the weather is improving the motorcycles are starting to make an appearance on the track. Not racing as yet, they are just practicing and testing out the improvements the teams have made over the winter period. However this gives us, as photographers, the chance to get out early and practice our skills.
We went along to the Vintage Motorcycle Club practice day held at Mallory Park. Not only did this give us the opportunity to practice our motorcycle track photography with some slower moving vehicles, but also giving our arty side an airing in the paddock.
For the enthusiast looking to dust off the cobwebs practice days are a great way to ease yourself back into the racing season. They are generally free or in the case of the VMCC practice day at Mallory Park last week it was just £3 to get in, bargain! As the teams take to the track I would suggest that these are excellent events for the photographer to exploit , enabling you to get track side and train along with the teams.
The only issue for practice and test days is they tend to be held during the working week. The VMCC practice day was held last Friday, the British Super Bike support races will be held this Thursday and the full on BSB media day on Tuesday the 9th April. Not an issue for me but you might not want to use your hard earned holidays for these events. 
Practice days are not as much fun as a full on race meeting, they are more relaxed and the riders don’t go for it out on the circuit, so you aren't going to get that amazing picture of the bike all crossed up laying darkies out of the corner. What you will get out of these practice days is the skills you need to be able to capture that great panning picture when it does present itself to you down the line.
What I'm talking about here is muscle memory. Let me explain, if you juggle every day you will be an amazing juggler if you only juggle once a week you won't be so good. That in a nutshell is muscle memory. And photography is the same, if you want good panning shots you need to practice, not every day but you do need to practice.
The basics of motorsports photography are simple to explain and execute. A shutter speed that matches or exceeds the focal length of the lens ensures the subject will be sharp, with no camera shake. An aperture that gives the correct depth of field and allows in enough light to expose the image correctly. Combine these with an ISO that allows you to balance the other two to give you the effect you want, this is called the exposure triangle. Don’t forget the focus and you are good to go.
Having said that there are no hard rules for motorsports photography. The settings you can put in your camera are as varied as people's opinions on politics. You might prefer shutter priority or full manual, your auto focus setting might be continuous with 9, 21 or 150 focus points or manual, just focusing on a predetermined point on the track. 
Regardless of what camera settings you like to use you will have to move your camera to keep the vehicle in the viewfinder. This movement is critical to capturing a good motorsports image. You can use a fast shutter speed and all of your shots will be sharp but will look wrong as the vehicle will be frozen and appear to not be moving. Motorsports is all about speed and movement so you really need to capture that aspect of the sport. To capture the movement motorsports photographers use a technique called panning, but that word can be misleading. 
When I chat to people about panning they will start to talk about sweeping movements, tracking the vehicle to be photographed. This is true for the most part but it can also only be a few cm of movement. If we look at the example below the bike is in a fast corner heading straight at you, little movement is required to capture this image. You have two options here, a very fast shutter speed to freeze the bike or a slower one to introduce a bit of blur.
As a rule of thumb you want the wheel spokes blurred and there to be little to no visible tread on the tyres, not an issue with slicks but if you are photographing cars you don’t want the manufactures name on the tyre sidewall visible. If you do use a very high shutter speed the image will look like it's not moving which is not a pleasing picture. The only time I will do this is if I get to a position where I am head on to the vehicle and can't see the wheels. 
With the following pictures we had to comprise; the angle and speed the bikes were arriving at the apex of the corner gave us little time to acquire them so the shutter speed is a little higher than I would usually set but even with the low light conditions it's still a pleasing picture. 
So, to get a good panning shot you need a slow shutter speed and to make sure the vehicle is sharp you need to move your camera at the same relative speed as the subject. Sounds simple, in practice it's not. The first consideration is the lens you are using. A short focal length lens is easer to pan with. The example below is a 1/50th sec but I was using a 17 - 55mm lens at 55mm. 
As the focal length increases you need to increase your shutter speed. Why do you need to do that? Well try it out now if you have the kit to hand. A 50mm lens will show little to no movement in the view finder, a 600mm lens the image will be moving all over the place. The movement at 50mm is the same as 600mm it's just been magnified and you are able to see it. If you can see it so can the sensor on your camera that produces the final image. Using a fast shutter speed will freeze the camera shake but will not produce that pleasing motorsports image you want. You need to mitigate the camera shake by introducing your own movement, panning.
The standard hand held technique for panning is to stand looking at the part of the track that you want to capture the bike. Then turn your hips and upper body to look at where the bike is going to appear, but don’t move your feet. Bend your knees slightly, tuck your elbows in and track the bike by moving your upper body smoothly. Any movement up or down or tracking too slowly or too fast will compromise the picture. 
The best results are when the rider is directly in front of you and further away. I see a lot of photographers up close to the track who have massive lenses. If they were to stand back and use the reach of the lens they will see that the further they are away from a moving subject the slower it appears to move. This gives more time to compose the shot and will give more blur. If you are still struggling and not getting the results you want with the hand head technique there are a few options that can help you out.

The first one is vibration reduction that is built into most modern lenses and some camera bodies. There are various modes depending on the manufacturer, check your hand book or just go to the track and try them out and work out what is best for you.


For up to 200mm I don’t bother with VR; for long range sniping I select a sports mode this is called Normal on a Nikon, active is used when you are in a vehicle. This reduces the VR in the camera viewfinder, helping you with tracking and also the image hitting the sensor.


The electronics are smoothing out the camera shake, allowing you to have a much lower shutter speed but not displaying the camera shake in the viewfinder helping you judge the speed of the vehicle correctly. 

There has been a lot of discussions on VR and sports photography and how useful it is. When VR first came out it allowed you to hand hold a long focal length lens at a low shutter speed that was unheard of. These first VR lenses were not great at panning. However, new algorithms have now been incorporated that detect that you are panning and compensate. I'm no electronics expert but at long focal lengths I get more keepers with VR on than off.
The second method is using something to stabilise the camera and lens. A tripod would be the best bet but not practical at the track, so a monopod is recommended. These require a very different technique to hand holding and a lot of practice to get it right. I see a lot of people using them with the leg straight down. Great if you are freezing the action at distance or moving the camera a short distance but If you try and pan you will see the camera will move in a semi circular motion while tracking, going from low to high to low. 
This will work but not produce a sharp image all the time, although to be fair, if you are producing pin sharp images all the time you won't be reading this you will be track side snapping Lewis Carl Davidson Hamilton MBE in his shiny Mercedes-AMG. If you angle the monopod between your legs or away from you, then you can track in a flat plane. A tilt head on top of the monopod is required for this method and a fluid base or head will help a lot. 
The shutter release is also very important. Snatching at the button will upset the smooth motion and induce more movement. My preferred focus and shutter release method is to map one of the buttons on the back of the camera for focusing, so I'm pushing forward not down at the initial focus point. Combining this with continuous auto focus I will acquire the bike, press the back focus button, track the bike and then press the main shutter release slowly and follow the bike while the shutter fires. 
As a starting point for your settings around f8 and 1/320 of a second will give you a reasonable amount of blur with a telephoto or a superzoom as seen in the picture below (the f stop is dependent on the lighting conditions). Once you have mastered that shutter speed start to drop it down to induce more blur into the background. Don’t forget to adjust the aperture when you adjust the shutter speed or set the camera to S (Nikon) or TV (Canon) and let the cameras electronics sort the aperture for you.
The last thing to consider is fatigue, holding a large lens and camera combination all day will be tiring. You are not capable of holding a camera 100% stable at any time. The muscles in your body are always moving - it's how you balance. As they move you get tired so adding a few kg of weight to the end of your arms is going to speed up the process. Take the weight off your neck and back as often as you can. This is where the monopod can help again. I don’t use a monopod for panning much but it's great for carrying a large lens around and supporting it in-between shots. 
When you review your pictures don’t get downhearted when shooting motorcyclists, they are difficult subjects to capture successfully when panning. A rider will move around on the bike so a lot of the time the bike will be sharp but the rider's head or body will not be sharp as he or she will be moving in a slightly different direction to the bike. In the case of the picture below all of that statement is reversed but still a great picture, they don’t have to be pin sharp every time.
There is not a lot you can do to mitigate that movement but you can observe. When leaning over at 100mph in the apex of a corner the rider is trying to keep the motorcycle as stable as possible so won't be moving much / trying not to fall off. Find this sweet spot and you should get some great results.
In conclusion, to get a great panning shot first time out is unlikely. You need to practice and when it doesn't work, practice some more, it will happen eventually. I hope you have enjoyed this write up and it helps you capture a memorable shot. As always I don’t claim to be an expert, it's just my observations from a day out at the track with a few friends. 

I would like to thank David Harbey Photography for helping out on this article. If you have any tips and tricks you would like to share with your fellow photographers or want to join us on one of our projects, drop us a line or head over to our Facebook page and leave a comment. 

A guide to taking motorsports photography


Our other articles on how to take stunning photographs at motorsport events including, panning, shooting through wire, locations, equipment, settings and much more.

how to take motorsport photos

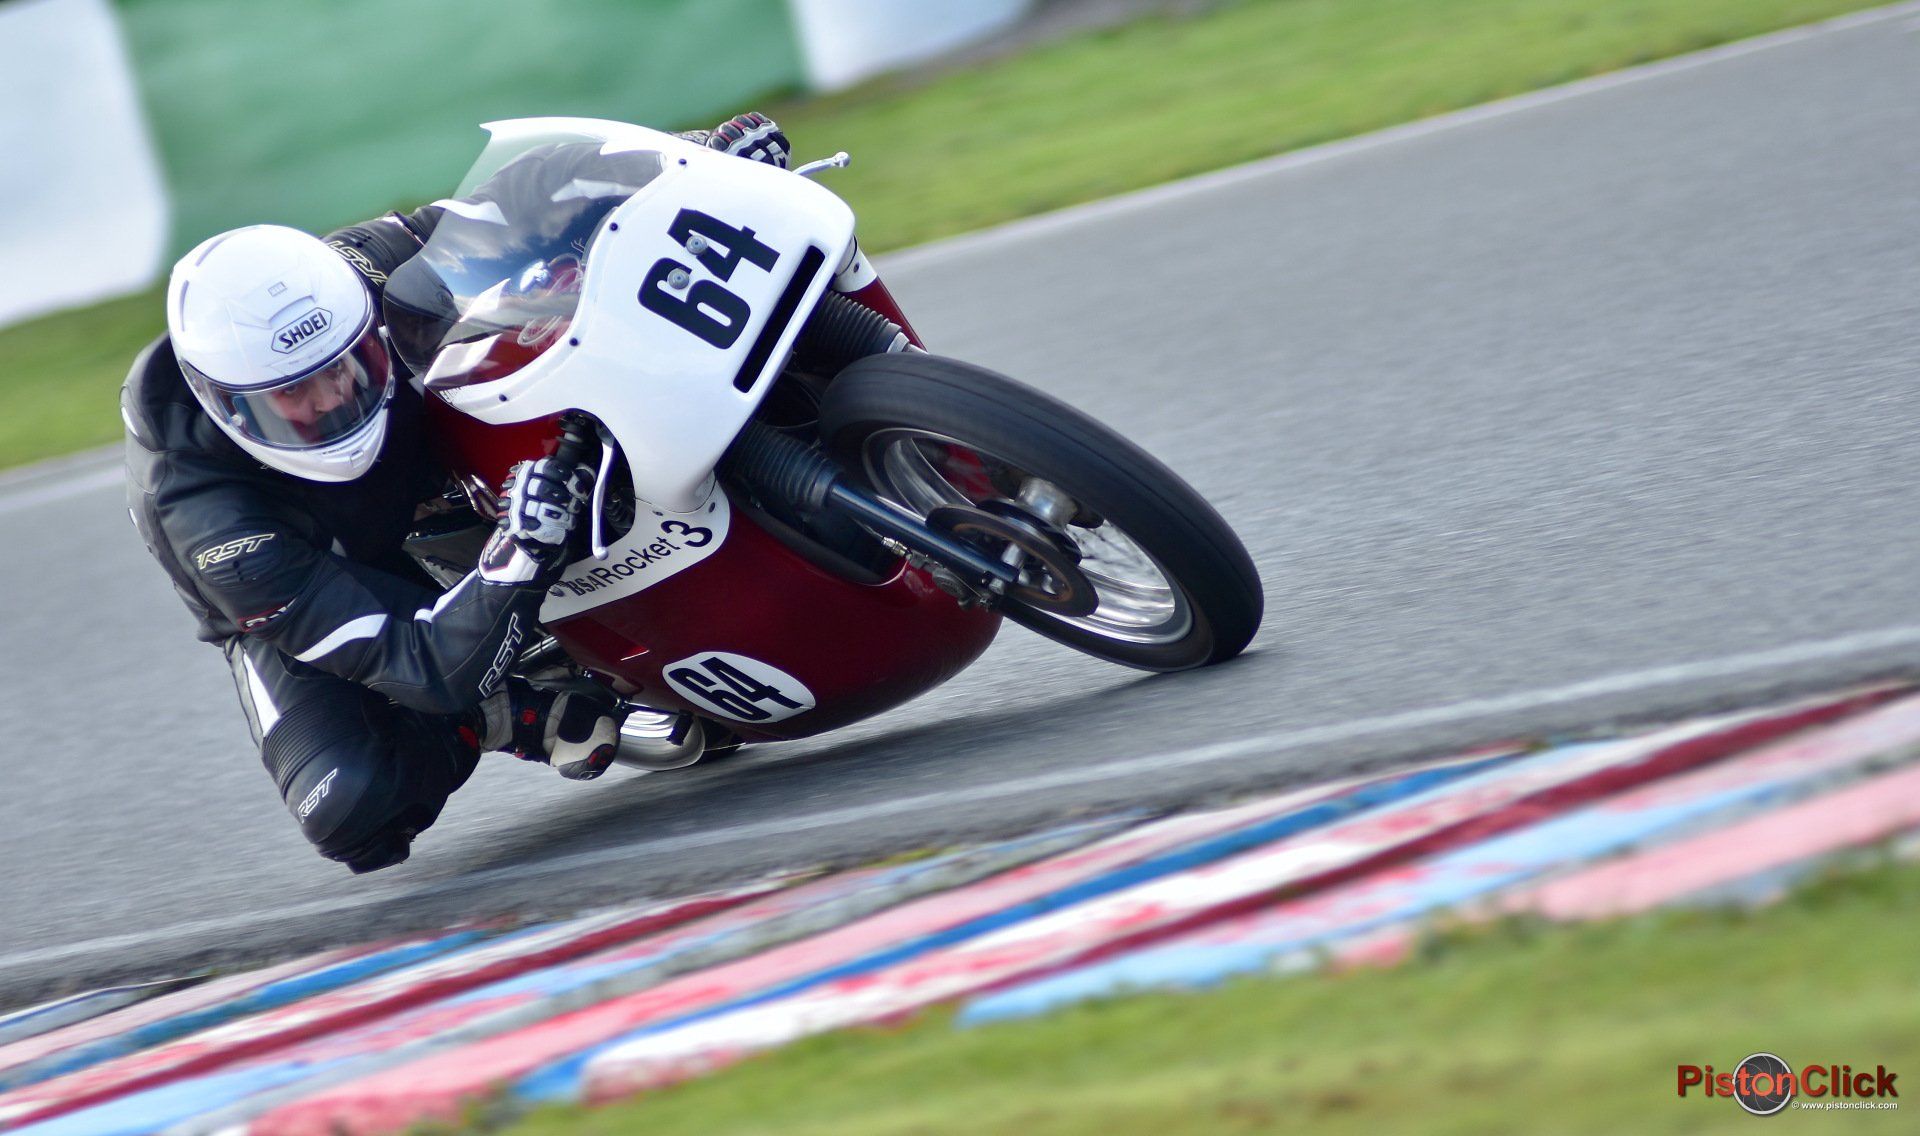
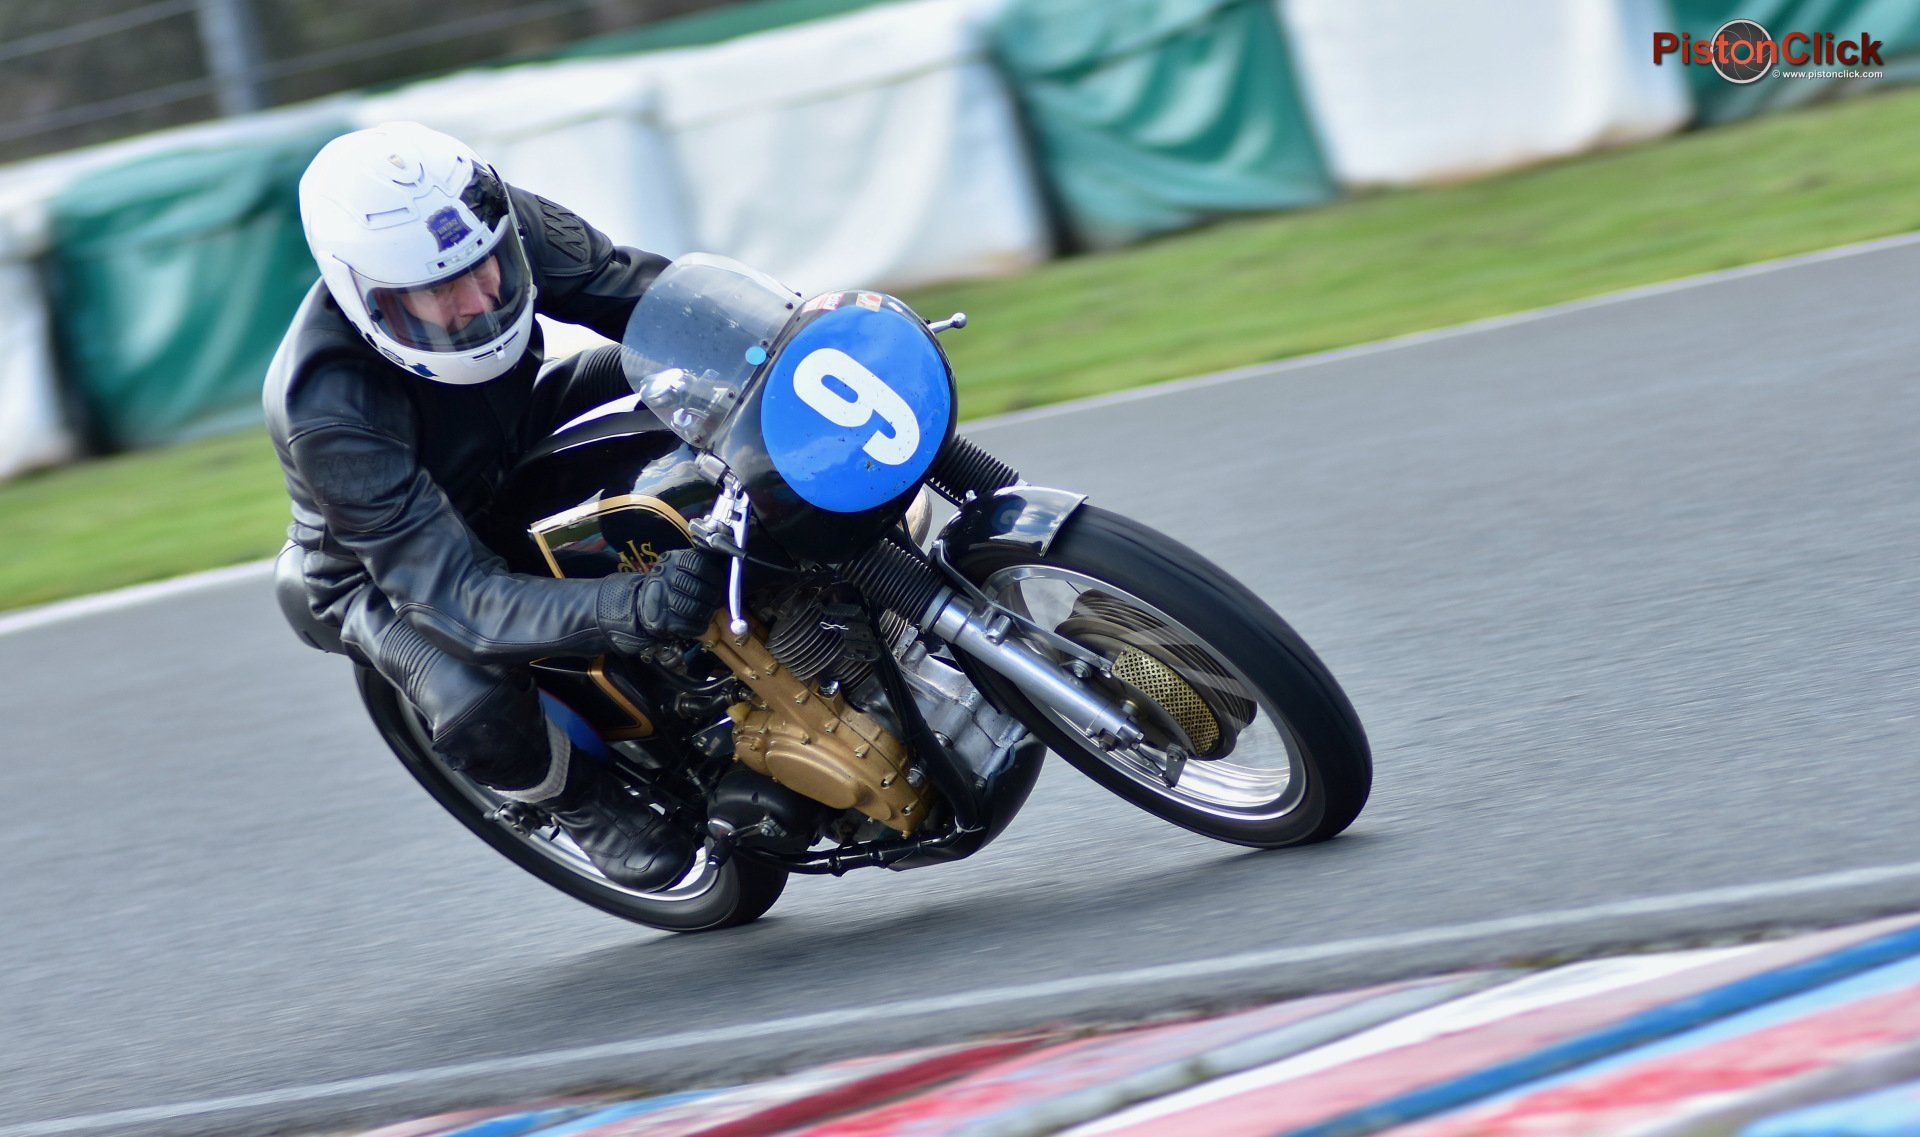
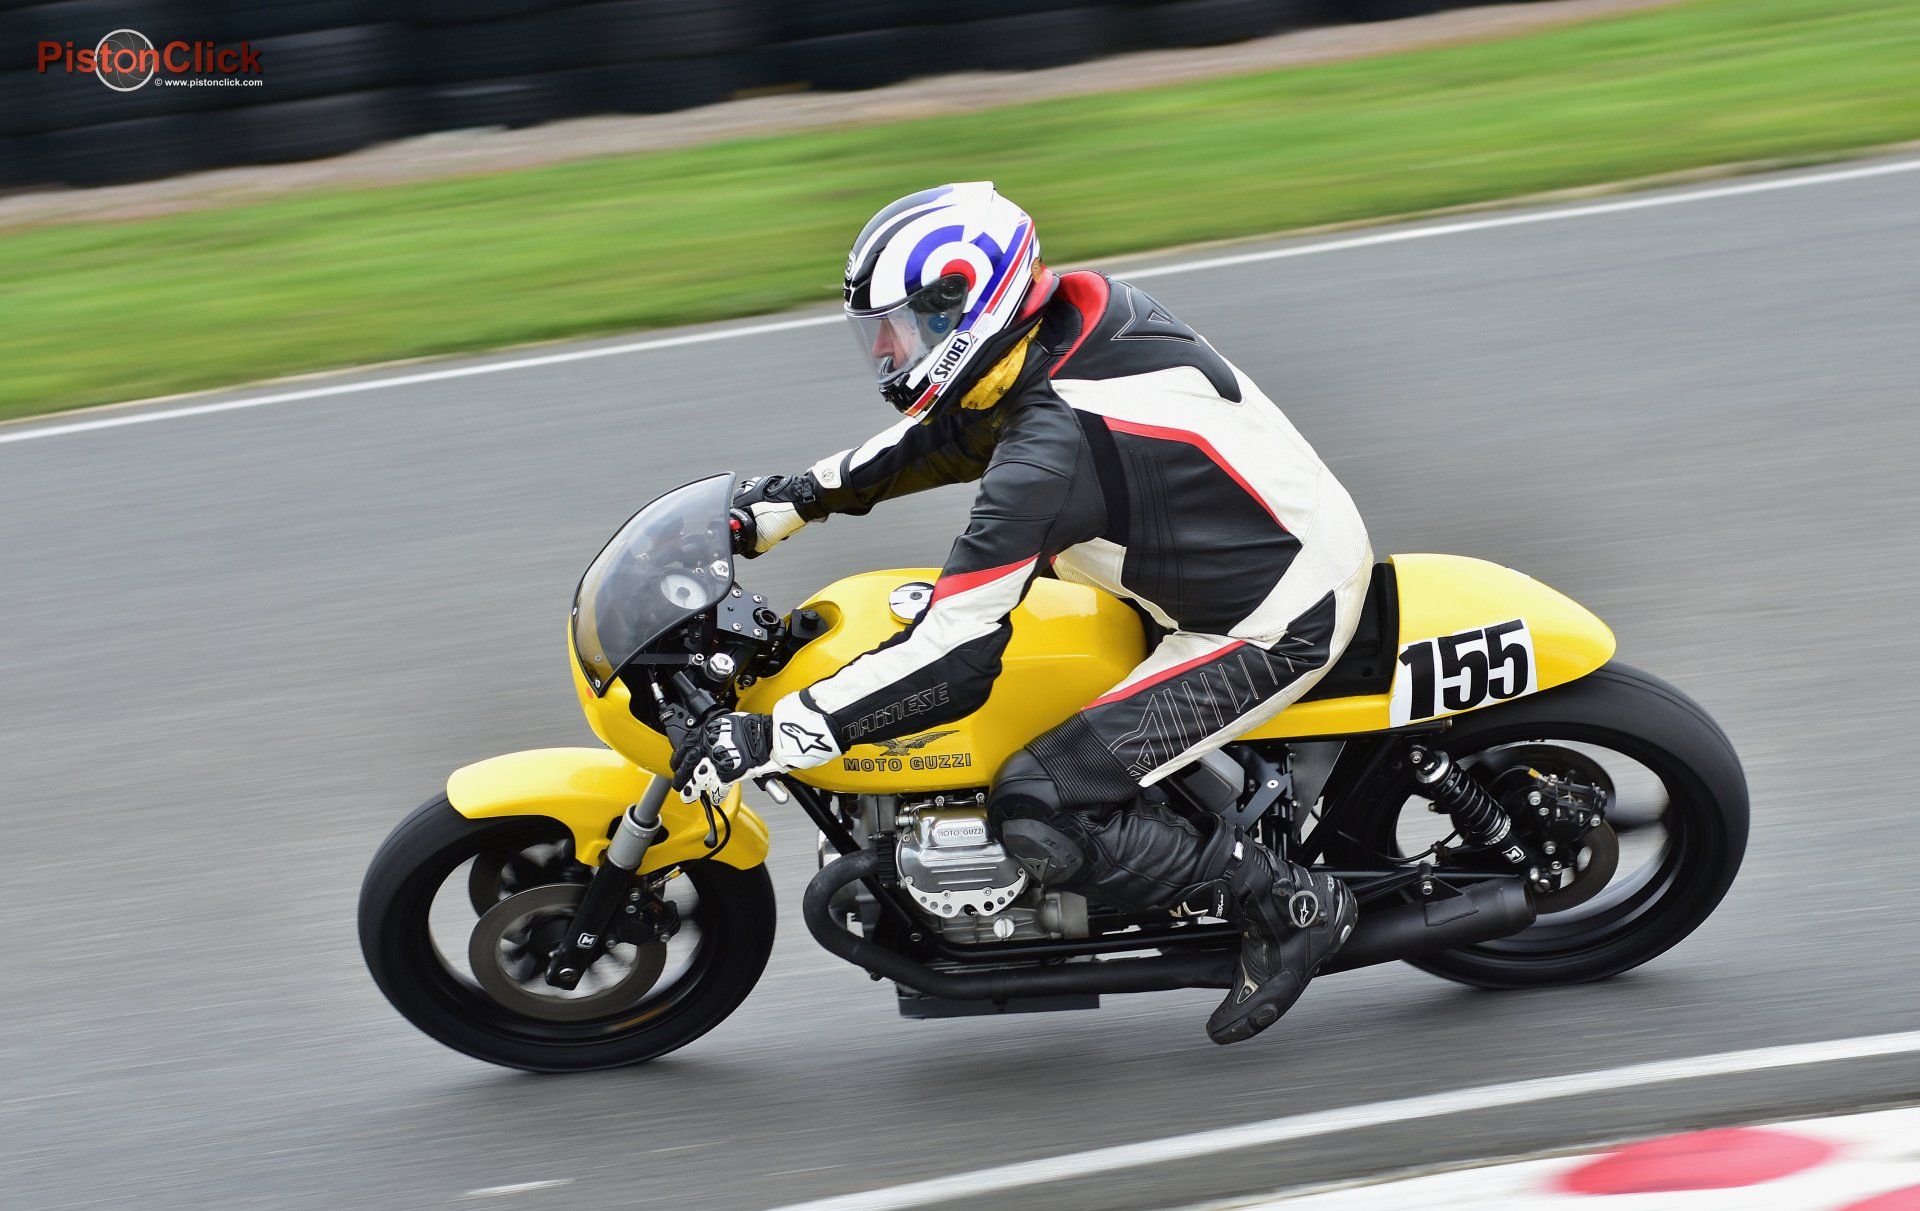
You can see smore examples of the PistonClick teams panning photos here in our "My three favourite panning pictures".

Share by: