
A guide to taking motorsports photography through safety fencing.
Report and images by Craig Whitaker.
2 November 2022.
If like me you go to a race circuits and have found safety fencing put up at more and more of your favourite photography locations, did you sigh a little out of frustration and completely avoid the fencing or think of it as a photographic challenge with a little creativity thrown in?
I have often searched and walked the track perimeter for a long time for a nice little gap like the ones used for marshals or safety vehicle access, and have even used steps or a grass bank to peep over a fence to get that capture. But if I come across a high safety wired fence, more than likely I have walked on for a few more hundred feet to find that nice low fence for those panning captures and a beautiful clear view of the track and cars.
What did you do? Well, I assume most of you also avoided it as I did, as I don't see too many photographers stand right up at the safety fencing. However, I hope to change this view from now on.
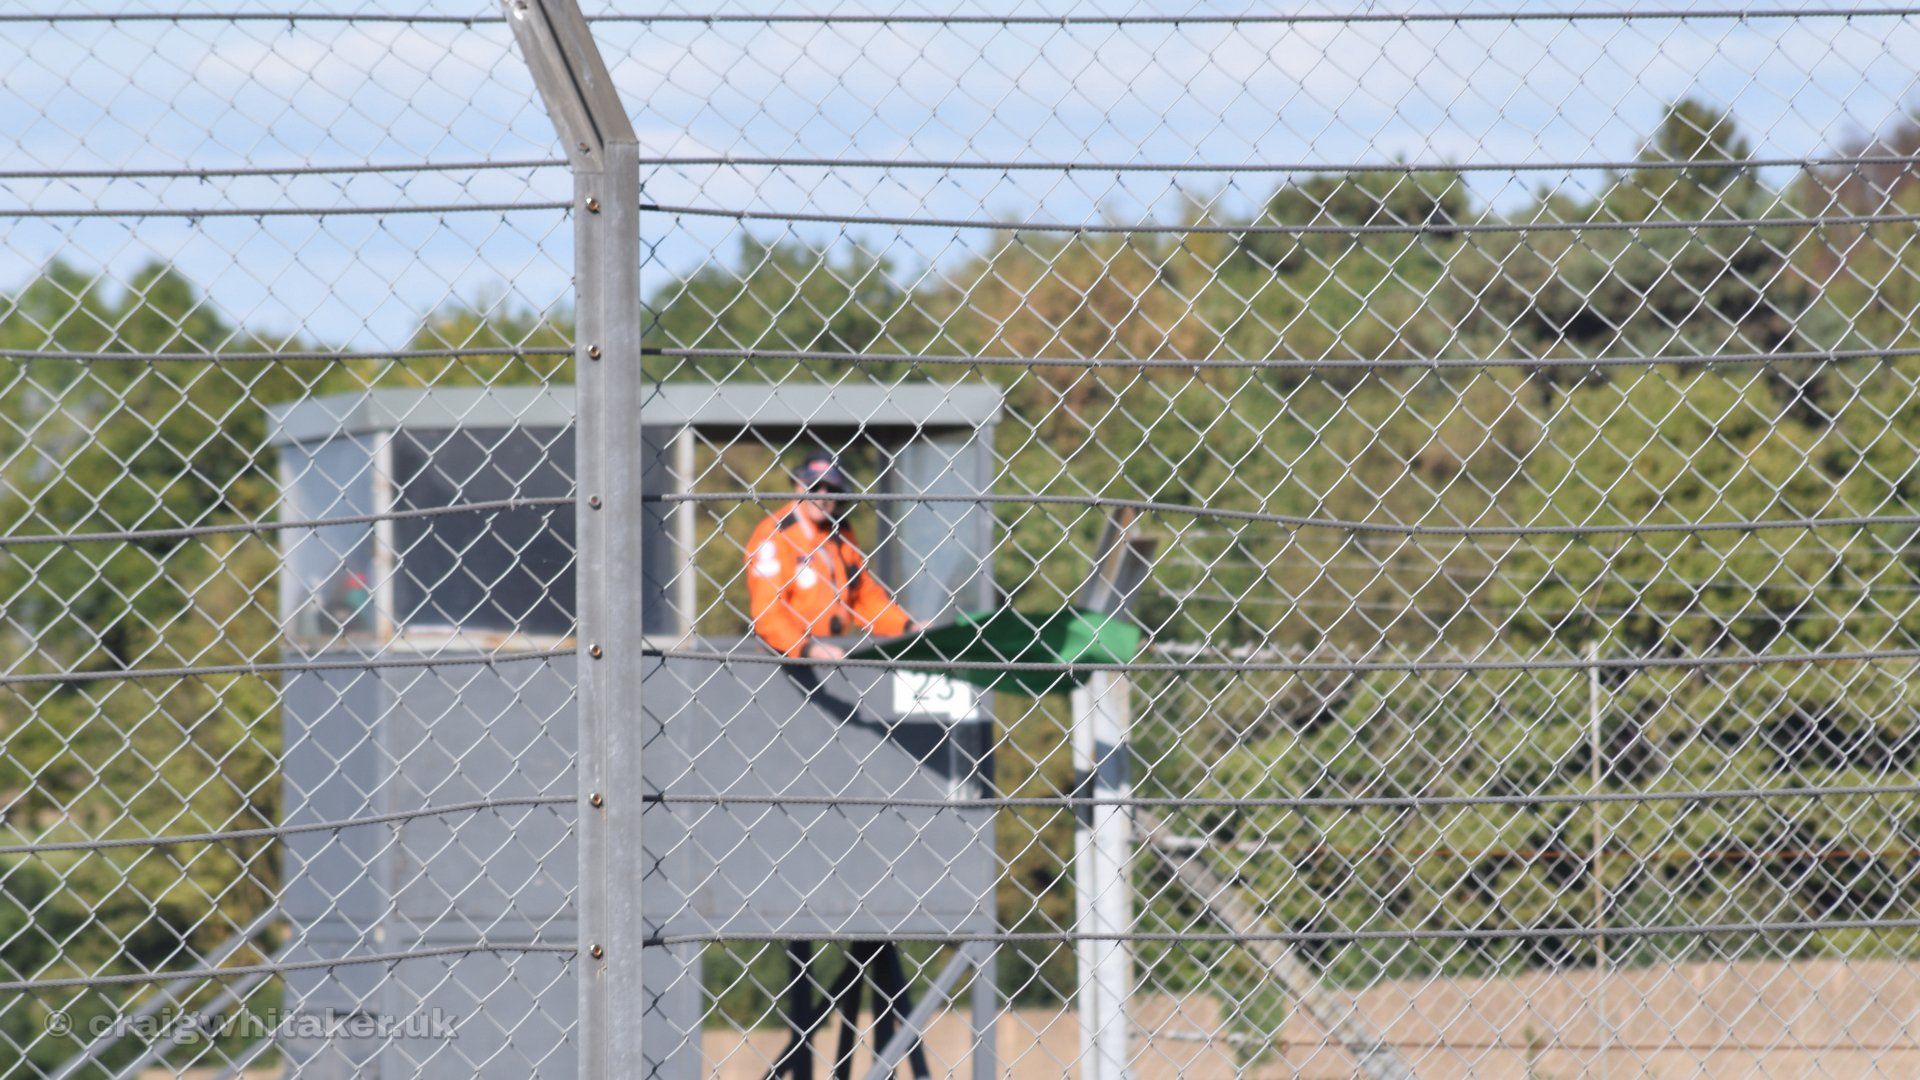
Standard Wired Safety Fencing Close Up.
With safety in motorsport being a priority now more than ever, I totally understand the reasons why there is so much fencing and having recently watched more and more collisions or accidents, without a doubt I agree that safety fencing is priority.

One day I randomly came across an article of someone taking photographs with their camera through wire fencing at a wildlife park and noticed the fence had completely disappeared in a few of the photos, so I searched a little more. Seeing all the great photographs taken through fencing it really opened my eyes and my creative side.
So I thought rather than avoid the fencing and be negative, why not give it a try and practice capturing through the wire next time I was at a circuit?
My initial attempts came out looking like I thought they would, with the fencing appearing as a light cross hatching in front of the cars, but I was still pleased with the result.

With good post photo editing I had an idea that I could remove any marks but also thought this would be a lot of work on each capture so nearly gave up. However, looking through my photos I noticed just one where the fence had all but disappeared even with panning. So, I quickly took a few more photos and slowly but surely, I had made the fencing all but disappear.
What settings to use?
Well there are no set rules as such as quite a lot is trial and error from where you are standing, but from my own experience and reading up on what other photographers have also discovered, the first thing to try is to get as close as safely possible to the fence and try manual focus first. Or if you have a fancy superzoom and are using auto focus, the lens will have two focus settings, 6m to infinity and full focus range. Set it on the 6m – infinity so you don’t accidently auto focus on the fence.
I also found keeping a shallow depth of field with quite a low f-number of around F5 should help even more. But keep in mind how much depth of field you need to get all of the target in focus and what is the sweet spot for your lens, they are all different.
If panning at speed up to 1/125 sec it can take a few tries depending on the lighting and the speed the cars are travelling. It will not be a 100% success rate so be prepared to delete a few extra than normal or try a different position.
Also note that not all the fencing will disappear if you are positioned too far back. This can also work in your favour as the wire and barriers will be at speed too, so it gives nice framing and a different effect if panning so just keep trying.

Final thoughts
Why not give it a try next time you are at your favourite circuit? I have found it has opened my eyes to many more creative opportunities. It does take a little practice like anything, but it is nice to use on occasion especially if the circuit is busy.
I am finding much better positions to capture from, where there are no large crowds in front or next to me, parked cars behind, or those lovely red bins I never seem to see until afterwards!
Taking photos through the fencing could bring different backgrounds, trees, framing, new compositions to your photographs and you never know you may get those few extra captures on the day that you were not expecting.

Captured with the safety fencing in front of me but can you see it?
Editors Motorsport Photography tips and tricks
Craig has hit the nail on the head. When taking a photograph through a fence panning will reduce the effects of the fence, or get as close as you can to the fence with using a wide aperture. However, there are so many other factors that come into play to get that shot through a fence.
Observation is the key here.
When you set up, look down the side of the lens to the target area and make sure there is nothing but the fence obscuring your view, such as a thick supporting wire. You might not see it by just looking your through view finder, but it will show on your final image.
Also, try and get the centre of the lens in the middle of the wire hole to minimise the amount of wire to the outside of your image. This only works for non-panning capture photography.

Try and set up so you are looking through the minimal amount of fence. 90 degrees to the target is optimal, the greater the angle the more fence you are shooting through so the softening of the image will be greater. The main factor is the lighting conditions. Dull overcast days are the best as the light is diffused and not shining off the fence. Again, observation is key. Look at the weather forecast and plan your day around the track. If it is sunny, shoot where there is no wire, if it is dull go for the wire.

Panning. Silverstone Brooklands, 90 degrees to the action, sun at my back some shadow falling on the fence. Full Frame Nikon D3X, AF-S VR Zoom-Nikkor 200-400mm ƒ4G IF-ED II with a Nikon II 1.4 Teleconverter. Auto ISO 100 Focal Length 525mm F6.3 1/500s
Long focal length lens works best when shooting through fences, the shorter the lens more of the fence you will see so a correct lens camera combination is important. For example, the Melbourne Loop at Donington works best with a FX camera and long lens 400 – 500mm using a DX camera that has a crop factor of 1.5 will make your 500mm lens 750mm for cars this is too close, they won’t fit in the frame. Therefore, you will need to pull the lens back to the low 300mm thus inducing more fence artefacts into your picture.

Small amount of panning. WSB at Donington Park Melbourne Loop. NIKON D7200, AF-S VR Zoom-Nikkor 200-400mm ƒ4G IF-ED. Auto ISO 224 Focal Length 525mm F6.3 1/640s

Capture. Donington Park 90 degrees to the action, overcast day. Auto ISO 112 Focal Length 232mm F6.4 1/620s.
This image was shot on a Crop body Nikon, a D7200 and with a AF-S NIKKOR 70 -200mm 2.8 FL ED and a 1.4 teleconverter. When the rider came off (there are multiple images in this sequence) I immediately thumbed right in the rear control wheel to increase the shutter speed (this is why I always use auto ISO) and thumbed down on the zoom to keep the rider in the frame as he was rapidly approaching me.

Small amount of panning. Silverstone under Club B Grandstand. Nikon D3x, Nikon AF-S 200-500 mm ƒ5.6. Auto ISO 100 Focal Length 500mm F9 1/400s
I don’t condone it but people will spray matt black paint on the fence reducing the glare, something I will never do but will look out for it and use those locations. Shadows falling on the fence have the same effect so look out for them as well.
As a final thought think about your own safety, is the picture you are trying to capture worth the risk of injury or death to yourself, the safety fence is there for a reason. Sticking your head above it could have dire consequences.
A guide to taking motorsports photography
Our other articles on how to take stunning photographs at motorsport events including, panning, shooting through wire, locations, equipment, settings and much more.

You can share this report with your friends on Social Media using these links.